How to Convert Mp3Juice Songs to Ringtones
In today’s digital age, personalizing your smartphone with a custom ringtone is one of the simplest ways to add a touch of individuality to your device. Whether it’s the chorus of your favorite pop hit, a snippet from a classic rock anthem, or an upbeat track that gets you motivated every time your phone buzzes, turning a full song into a ringtone can elevate your daily notifications from mundane to memorable. If you’re a fan of discovering and downloading free MP3s, sites like Mp3Juice offer a treasure trove of audio files ready for customization. But how exactly do you take a downloaded track from Mp3Juice and transform it into a ringtone? This comprehensive guide will walk you through the entire process step by step, from downloading to installation, while covering tips, tools, and best practices to ensure your new ringtone sounds crisp and professional.
We’ll explore everything you need to know, including platform-specific instructions for both Android and iOS devices, potential pitfalls to avoid, and even some creative ideas to make your ringtone stand out. By the end of this article, you’ll be equipped to create ringtones that not only reflect your personality but also perform flawlessly on your phone. Let’s dive in!
Understanding Mp3Juice and the Basics of Ringtone Creation
Before we get into the technical steps, it’s essential to understand the tools and concepts involved. Mp3Juice is a popular online platform that allows users to search for and download MP3 audio files from various sources across the web. It’s user-friendly, requires no account, and supports a wide range of genres, making it a go-to for music enthusiasts looking for quick, free downloads. However, keep in mind that while Mp3Juice itself is a search aggregator, the content you download may be copyrighted. Always ensure you’re only using tracks you have the legal right to modify—such as public domain music, royalty-free tracks, or songs you’ve purchased.
Creating a ringtone typically involves three core elements:
- Trimming the Audio: Ringtones are short—usually 15 to 40 seconds—to avoid disrupting conversations or meetings. You’ll need to select the perfect clip from your downloaded song.
- Format Conversion: Android devices often use OGG or MP3 formats, while iPhones require M4R (a variant of AAC). Converting ensures compatibility.
- Installation: Transferring the file to your phone and setting it as your default ringtone or assigning it to specific contacts.
With these basics in mind, let’s break down the process into actionable steps. You’ll need a computer for editing (though some apps allow mobile-only workflows), basic audio software, and your smartphone handy.
Step 1: Downloading Your Song from Mp3Juice
The journey starts with acquiring the audio file. Mp3Juice makes this straightforward, but following best practices ensures a high-quality download.
- Visit Mp3Juice: Open your web browser and head to the Mp3Juice website. The interface is clean: a search bar at the top, surrounded by suggested tracks and categories like “Top Downloads” or “Trending.”
- Search for Your Track: Type in the song title, artist, or even lyrics into the search bar. For example, if you want to turn the intro of “Bohemian Rhapsody” by Queen into a dramatic ringtone, enter “Bohemian Rhapsody Queen MP3.” Hit enter, and you’ll see a list of results with preview snippets, download links, and file sizes.
- Preview and Select: Click the play button next to a result to listen to a short sample. This helps confirm it’s the right version—no remixes or live cuts unless that’s your vibe. Look for files labeled as 320kbps for the best audio quality; lower bitrates (like 128kbps) might sound tinny on your phone’s speaker.
- Download the MP3: Click the “Download” button (often marked with an arrow icon). The site will generate a direct link, and your browser will prompt you to save the file. Choose a memorable folder on your computer, like “Ringtone Projects,” and name the file something descriptive, e.g., “Bohemian_Rhapsody_Full.mp3.”
Pro Tip: Mp3Juice occasionally shows ads or pop-ups—use an ad blocker like uBlock Origin to keep things smooth. Also, downloads are typically 3-5 MB for a full song, so they won’t eat up your storage.
Legal Note: As mentioned, downloading copyrighted material without permission can violate laws like the DMCA in the US. Stick to fair use for personal ringtones, or opt for free resources like the Free Music Archive if you’re unsure.
Once downloaded, verify the file by playing it in your media player (like VLC or Windows Media Player). If it sounds distorted, try another source from the search results.
Step 2: Editing Your Song Clip for Ringtone Perfection
Now comes the fun part: sculpting your MP3 into a ringtone. The goal is to capture the hook—the part that makes you smile every time it rings. Most ringtones clock in under 30 seconds to comply with carrier limits and keep things snappy.
Tools You’ll Need
- Free Desktop Software: Audacity (open-source and powerful) or GarageBand (if you’re on Mac).
- Online Editors: Tools like AudioTrimmer or Kapwing—no downloads required.
- Mobile Apps: Ringtone Maker for Android or GarageBand for iOS.
Detailed Editing Process Using Audacity (Recommended for Beginners)
- Install and Open Audacity: Download it from the official site (audacityteam.org). It’s free, lightweight, and works on Windows, Mac, and Linux. Launch the program and go to File > Import > Audio to load your Mp3Juice-downloaded MP3.
- Listen and Mark Your Clip: Play the track using the playback controls. Use the selection tool (the “I-beam” icon) to highlight the desired section. For instance, select from 0:45 to 1:15 for a verse-chorus combo. Zoom in with Ctrl+1 (Windows) or Cmd+1 (Mac) for precision.
- Trim the Audio: With your section selected, go to Edit > Remove Special > Trim Audio. This deletes everything outside your selection, leaving a clean clip.
- Enhance the Sound:
- Fade In/Out: To avoid abrupt starts or ends, select the first and last 0.5 seconds, then go to Effect > Fade In and Effect > Fade Out.
- Normalize Volume: Select all (Ctrl+A), then Effect > Normalize. This boosts the volume to a consistent level without distortion.
- Noise Reduction: If there’s background hiss from the download, select a quiet section, go to Effect > Noise Reduction > Get Noise Profile, then apply to the whole track.
- Export the Clip: File > Export > Export Audio. Choose MP3 for now (we’ll convert later). Set quality to 192kbps or higher to maintain clarity.
Time Estimate: 5-10 minutes per ringtone. For a pro touch, experiment with effects like reverb for an epic feel or speed adjustments for a chipmunk version (if that’s your style).
Creative Ideas:
- Build-Up Ringtones: Start with a quiet intro that crescendos into the drop—perfect for EDM tracks.
- Lyric-Focused: Pick lines that resonate, like “Hello from the other side” from Adele’s hit.
- Mashups: If you’re advanced, layer two clips, but keep it simple for first-timers.
Step 3: Converting the Format for Your Device
Your edited MP3 needs to match your phone’s ringtone requirements. Skipping this can lead to playback issues.
For Android Devices
Android is flexible—MP3 or OGG works fine.
- Use an Online Converter: Sites like Zamzar or Convertio let you upload your MP3 and select OGG as output. Drag and drop, convert, and download.
- Desktop Method: In Audacity, export directly as OGG via File > Export > Export Audio > OGG Vorbis.
- File Naming: Rename to something like “MyCustomRing.ogg.”
For iPhone (iOS)
Apple is pickier—M4R is mandatory.
- Convert MP3 to M4A First: Use FFmpeg (free command-line tool) or an online converter like CloudConvert. Upload MP3, choose AAC/M4A, and download.
- Rename to M4R: Change the file extension from .m4a to .m4r. (Right-click > Rename on Windows; Get Info > Name & Extension on Mac.)
- iTunes/GarageBand Sync: Open in iTunes (or Music app on Mac), select the file, and choose “Get Info” > Options > Start/Stop times to match your clip if not already edited.
Batch Tip: If you’re making multiple ringtones, tools like Online Audio Converter handle queues efficiently.
Step 4: Installing and Setting Your Ringtone
With the file ready, transfer it to your phone.
Android Installation
- Transfer the File: Connect your phone via USB, email it to yourself, or use Google Drive. Save to the “Ringtones” folder in internal storage (create it if needed).
- Set as Default: Go to Settings > Sound & Vibration > Phone Ringtone. Tap “Add ringtone” or select from the list—your custom file should appear.
- Assign to Contacts: Open Contacts app > Edit contact > Set ringtone.
iPhone Installation
- Sync via iTunes/Finder: Connect your iPhone to your computer. In iTunes (Windows) or Finder (Mac), drag the M4R file to your device’s “Tones” section under General > Tones.
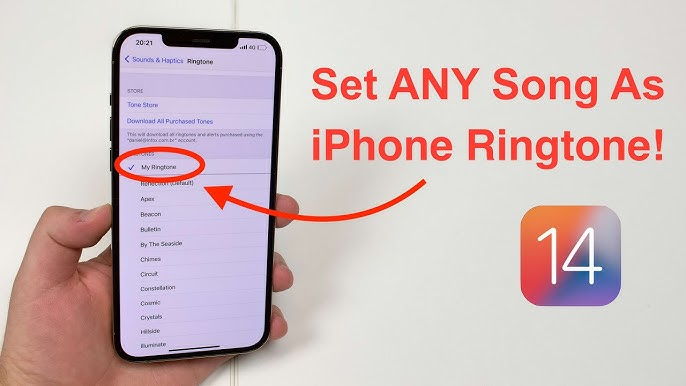
- Alternative: Email Method: Email the M4R to yourself, open on iPhone, tap to download, then Settings > Sounds & Haptics > Ringtone > select it.
- For Contacts: Use the Contacts app similarly.
Troubleshooting:
- Not Showing Up? Restart your phone or check file permissions.
- Volume Too Low? Re-normalize in Audacity.
- iOS Sync Issues? Ensure iTunes is updated and your device is trusted.
Advanced Tips, Tricks, and Best Practices
To take your ringtone game to the next level:
- Quality Control: Always test on your phone’s speaker and earpiece—headphones might sound great but fail in real use.
- Storage Savvy: Ringtones are tiny (under 1MB), but organize them in folders like “Family” or “Work” for easy assignment.
- Legal and Ethical Considerations: Beyond disclaimers, consider buying tracks from iTunes or Amazon for guilt-free customization. Services like Zedge offer pre-made ringtones if DIY feels overwhelming.
- Automation Tools: Apps like “Ringtone Maker” on Android or “Ringtones for iPhone” integrate downloading, editing, and setting in one flow—though they may have ads.
- Cross-Platform Compatibility: If you switch phones, keep M4R files as a universal backup.
- Eco-Friendly Note: Digital ringtones reduce the need for physical merch—sustainable personalization!
Common Mistakes to Avoid:
- Downloading low-quality files: Stick to 192kbps+.
- Over-editing: Simple trims beat heavy effects for everyday use.
- Forgetting Backups: Save originals before trimming.
Alternatives to Mp3Juice for Sourcing Songs
While Mp3Juice is convenient, diversify your library:
- YouTube Audio Library: Free, royalty-free tracks downloadable as MP3.
- SoundCloud: Artist uploads with direct downloads.
- Paid Options: Spotify or Apple Music exports (via third-party tools, legally).
- Built-in Phone Libraries: Many devices have stock sounds you can remix.
Conclusion: Ring in Style with Your Custom Creations
Converting songs from Mp3Juice to ringtones is a rewarding blend of creativity and tech savvy that turns everyday alerts into personal soundtracks. From the initial search on Mp3Juice to hearing your masterpiece blare during a call, the process empowers you to curate your auditory world. Remember, the key is starting simple—grab a track, trim the magic, convert, and install—then iterate as your tastes evolve.
Whether you’re setting a motivational beat for work calls or a silly sound for spam, these custom ringtones add joy to the chaos of notifications. Got a favorite song you’ve turned into a ringtone? Share in the comments below—we’d love to hear your stories! If this guide helped, bookmark it for your next project. Happy ringing!